It is a commonly known fact that resource management on Android isn’t something to be very proud of. Despite iPhones having a third or lesser of the RAM found in the most recent generations of Android smartphones, they remain to be the top performers because of the strong memory management in iOS. It is very common for new Android smartphones to have over 8GB of RAM and in some cases as much as 16GB of RAM. While this might feel like overkill for a few especially considering the fact that iPhones come with much lesser RAM and offer a very similar if not better performance.
This might just be the OEMs planning ahead and trying to compensate for Android’s shortcoming as no one wants to spend a thousand dollars on a brand-new smartphone for it to lag. While increasing the amount of RAM does help in most cases, it is not the only way to ensure a smooth performance. There are many ways a user can do some manual resource management and optimize Android devices in ways the operating system doesn’t offer natively. It is possible to get exceptionally better performance by taking control of some aspects and by optimizing other aspects of your Android smartphone. So here’s a guide on how to optimize Android for best performance.
Also Read: Plato: Best Gaming App for Kids in Lockdown
Step 1: Uninstall Power Hungry Apps
The first step for optimizing your Android device is to uninstall the apps that you are not using and are draining your battery for no reason. In most cases, users have quite a few of them. There are multiple ways to uninstall apps, you can simply go to the app drawer, tap, and hold on an app and selecting the uninstall option. The alternative option is to navigate to the Settings app and moving to the Apps section. This will list all the installed applications on your smartphone in alphabetical order. Click on any app to get the information about that app and it will show you how much space it is taking up along with other details such as the permissions granted.
Also Read: How To Sanitize Your Phone At Home During Corona
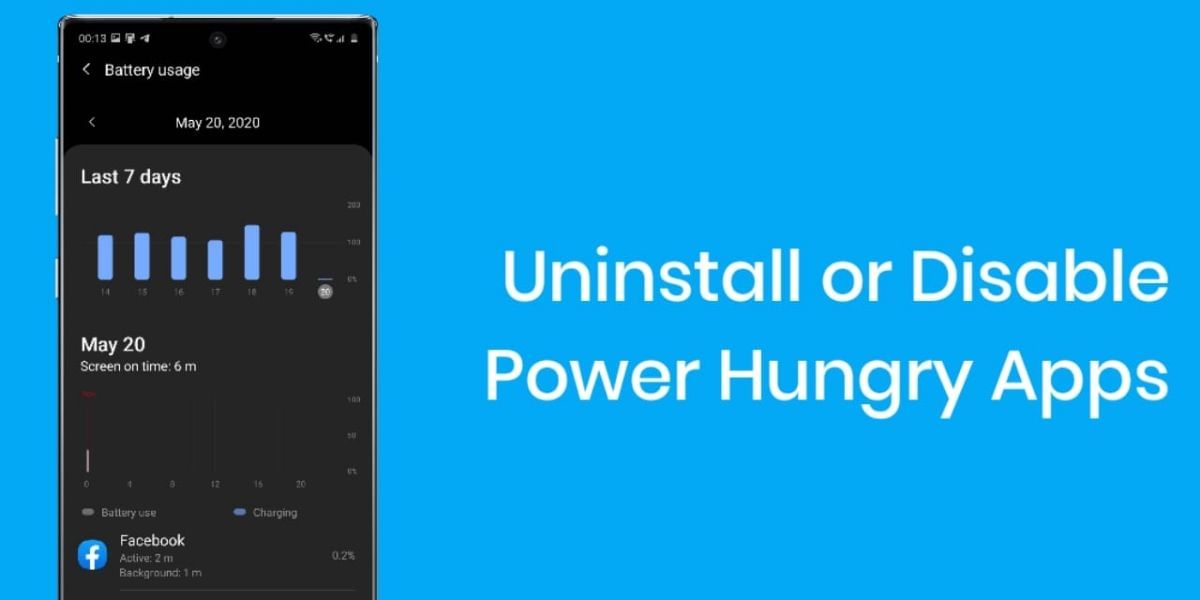
Now look for the Uninstall button usually in the bottom and tap on it to remove the application form the installed list on your smartphone. If it is a System default app then you will not be able to uninstall it, rather you can choose the Disable option which is the closes you can get. Disabling an app on Android will minimize the amount of space being occupied by the app on your smartphone and removes it from the App Drawer too.
You can alternatively check out the Battery section in the Settings app, this should show you a graph of the power consumption on your phone. You will also see a list of apps that are putting stress on your battery in the descending order. You can individually choose the apps and put them to sleep here.
Step 2: Adjust the Sync Settings
Android phones are configured in a way that at any given time your phone might be syncing to some of the other cloud servers. It might be syncing contacts, photos, email, or maybe even just your device settings. Depending on how regularly this happens, your device could be syncing in the background majority of the time and taking up valuable resources from elsewhere. This will certainly add more strain on the battery so it might be a good idea to change the sync settings on your smartphone to optimize the battery consumption
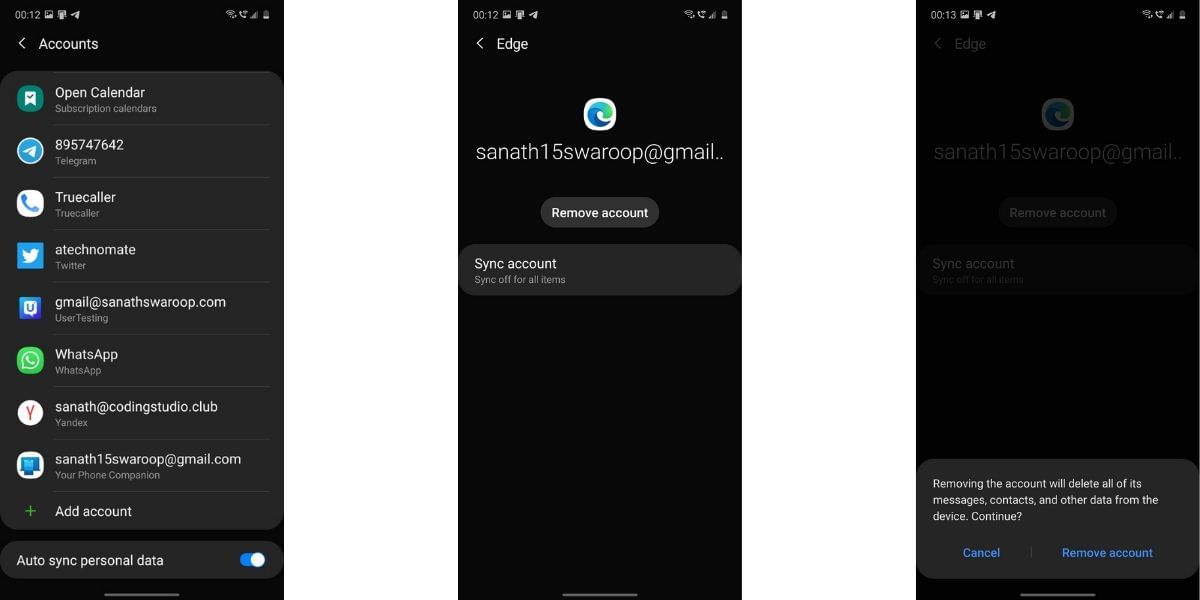
You can open the Settings app on your smartphone and navigate to the Accounts section, this will list all the Accounts configured on the smartphone. You should be able to find an option for auto-sync here, find it, and turn it off. Instead of turning the sync off completely, you might want to look through the list of the accounts to see if there are any that do not need syncing and remove them.
Also Read: How to enable Hindi or any other language on Google assistant?
You will have to go to each account’s respective application and edit the app settings to increase or decrease the amount of time between the syncs if you want to change the sync internally and keep it.
Step 3: Ensure your Device is Updated
It is important to ensure that your Android device is running on the most recent firmware and has the latest security patch installed. This will not only improve the security but also the performance, this is important for new and old devices as a lot of bugs that handicap a device performance can only be fixed through a software update. Luckily it is extremely easy to check for software updates and you can easily head to the settings app and check for any pending updates.
Also Read: Internet Safety Tips for Kids in Coronavirus Lockdown
Step 4: Adjust the Animation Speed
One of the very nice things about Android is the smooth animations used throughout the software. You can see these when you open or close an app, check the notifications, or while navigating through the app drawer. While these animations make Android look so much nicer, they might also slow down the device a little bit. This can be easily solved by adjusting the Animation Speed in the Developer Options section of the Settings app.
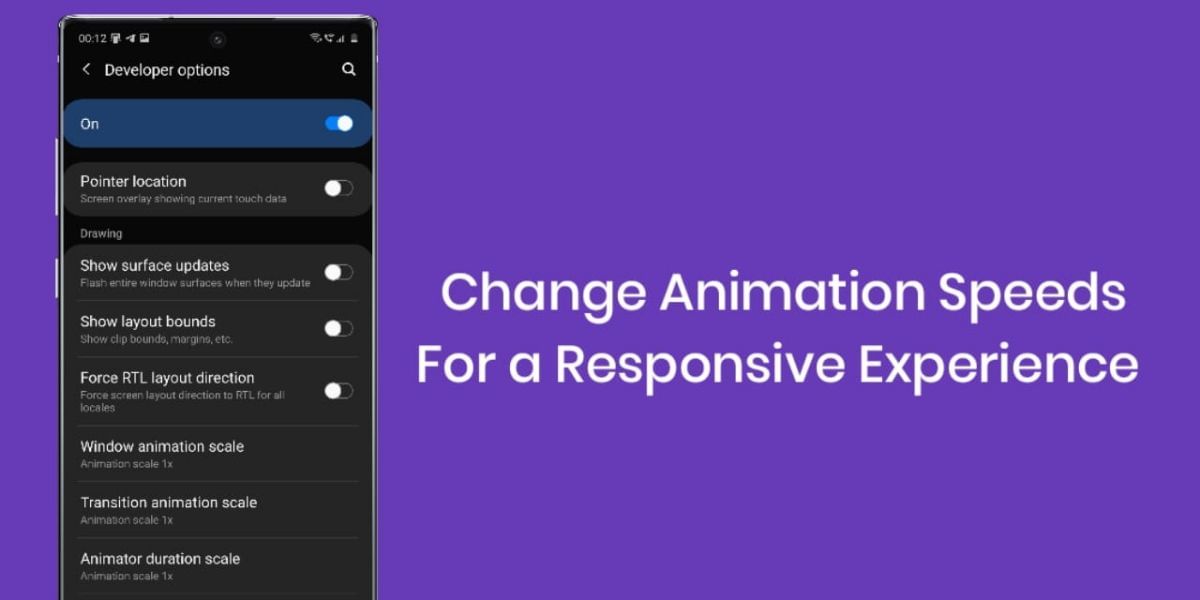
If you have never activated Developer Settings, then you will first have to navigate to the Settings app and head to the About Phone section. You will now see a list of details about the smartphone including the version number and the security patch installed. Find the Build Number and tap on it eight times and you will see a prompt that says, “You have activated Developer Options”, now return to the Settings and you will see a new section called Developer Options.
In the Developer Options sections, you will see multiple options and settings that can be changed, scroll down halfway and you will find a section called “Drawing”, here look for the animation controls such as window animation scale, transition animation scale, and animation duration scale. By default, the value is “1x” for these three, you can improve the animation speed by reducing it to either 0.5X or turning it off. Once the animations have been reduced you will see a major difference in the overall use of your Android Smartphone.


