Installing a printer driver can be a simple process, but it can also be a bit confusing for those not familiar with the process. Installing a printer driver is the process of adding a printer to a computer so that it can communicate with the printer and print documents.
There are several ways to install a printer driver. The most common method is to use the installation CD that came with the printer. Another method is to download the driver from the manufacturer’s website. It is important to ensure that the correct driver is selected for the specific make and model of the printer being used. Once the driver is installed, the printer should be ready to use.
In this guide, we will walk you through the steps involved in installing a printer driver. This involves downloading the printer driver and setting up the printer with your system.
Whether you are setting up a new printer or upgrading an existing one, this guide will provide you with the information you need to get your printer up and running quickly and easily.
Also Read: Laser Printer: Why It Should Be Your Next Purchase?
What Is a Printer Driver?
A printer driver is a piece of software that allows a computer to communicate with a printer. It acts as a translator between the operating system and the printer. This allows the computer to send print jobs to the printer in a format it can understand. Without a printer driver, a computer would not be able to send print jobs to a printer. Printer drivers are typically provided by the manufacturer of the printer. These drivers can be installed on a computer through a CD or downloaded from the manufacturer’s website.
Without a printer driver, your computer would not be able to send print jobs to your printer, and you would not be able to print any documents. Printer drivers are specific to the type of printer you have and the operating system you are using. So it’s important to make sure you have the correct driver for your printer and operating system.
Types of Printer Drivers
Printer drivers can be divided into two main categories, and those are Host-based and Windows-only.
Let’s discuss these two categories in brief:
- Host-Based: Host-based printer drivers are designed to work with a specific operating system, such as Windows or Mac. These typically offer more advanced features and better performance than Windows-only drivers.
- Windows-only: Windows only drivers, on the other hand, are designed to work with any version of Windows and offer basic functionality.
When you purchase a new printer, it typically comes with a CD or DVD that contains the necessary drivers for your operating system. You can even download the latest drivers from the manufacturer’s website. Once you have the correct driver, you can install it on your computer and begin using your printer.
It’s also important to keep your printer driver updated. Manufacturers often release updates to fix bugs and improve the performance of their printers. You can check for updates on the manufacturer’s website or through your computer’s operating system.
Steps to Install Printer Driver on Windows 10
Installing a printer driver can seem like a daunting task, but it’s actually a simple process that can be completed in just a few steps. You can follow these instructions to get your printer up and start printing whatever you want!
Before you begin the installation process, you’ll need to gather a few pieces of information about your printer. Make sure you have the make and model of your printer, as well as the type of connection you will be using (such as USB or Ethernet).
Step 1: Go to Start > Settings in Windows.
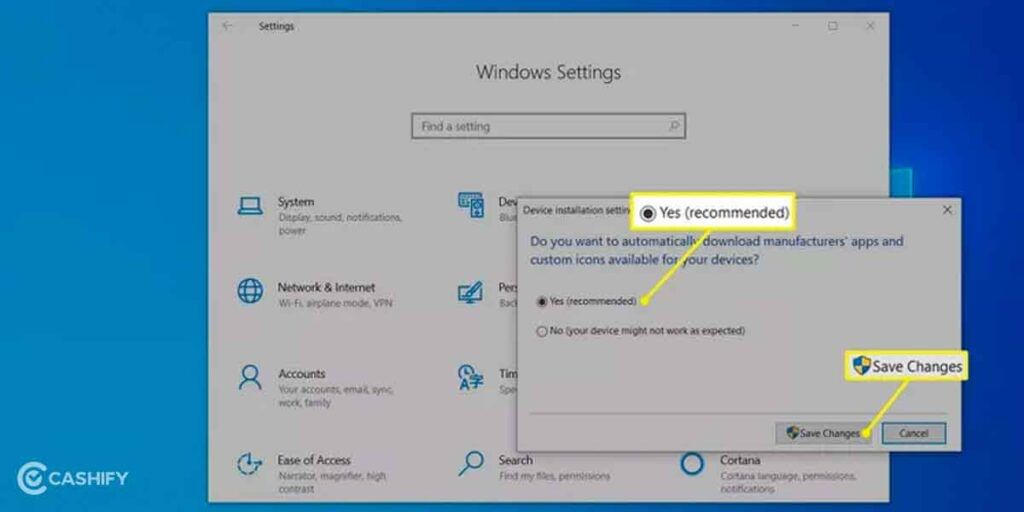
Step 2: Type “Device installation” into the Windows Settings search box, then select “Change device installation settings”.
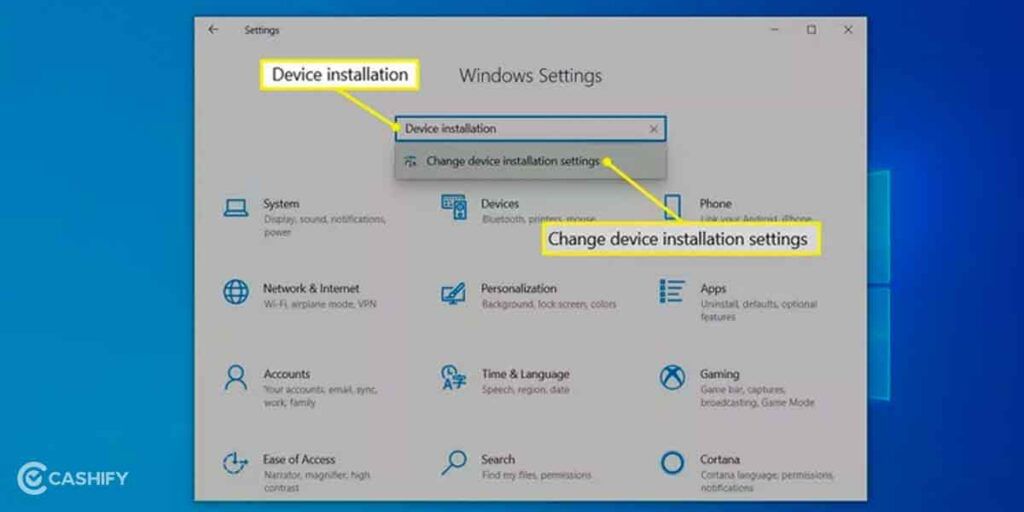
Step 3: On the Device Installation Settings window, select Yes, and then either select Save Changes or close the window.
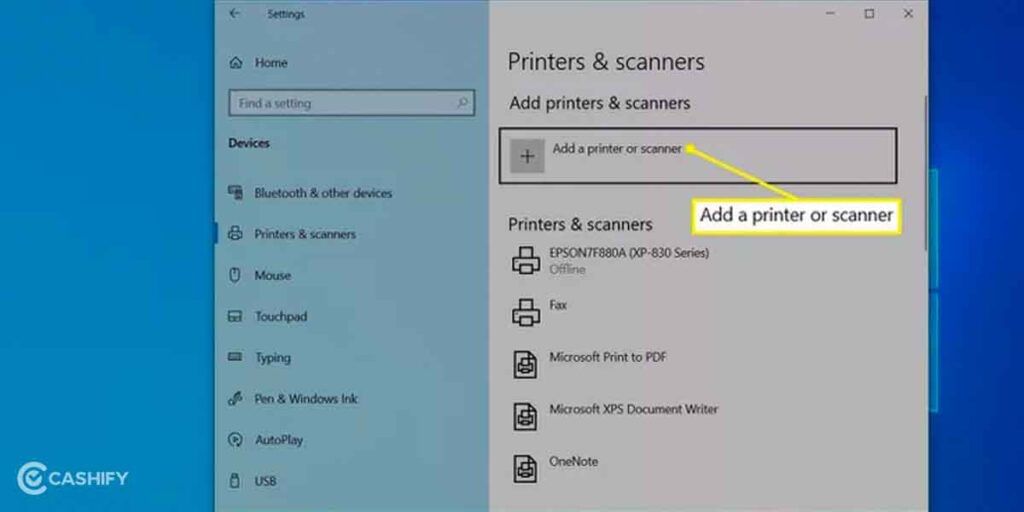
Step 4: Type “Printer” into the Windows Settings search box, then select Add a printer or scanner.
Step 5: Select “Add a Printer or Scanner” from the Printers & scanners page.
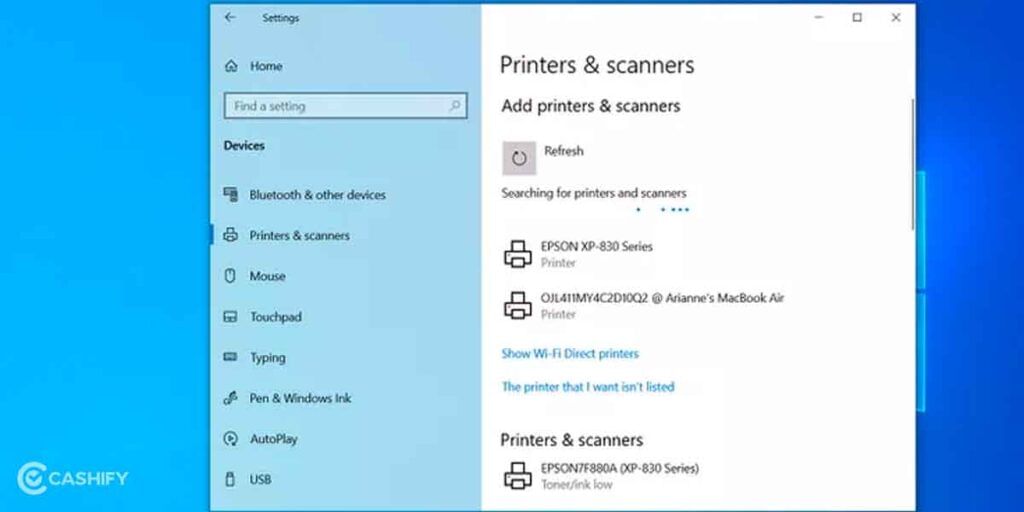
Step 6: Select the printer from the list and follow any additional instructions that appear.
That’s it! You’ve successfully installed your printer driver and are ready to start printing.
Also Read: Printer Buying Guide For Home
Steps to Install Printer Driver on macOS
The process of installing printer drivers is more or less the same on macOS and here is a step-by-step guide.
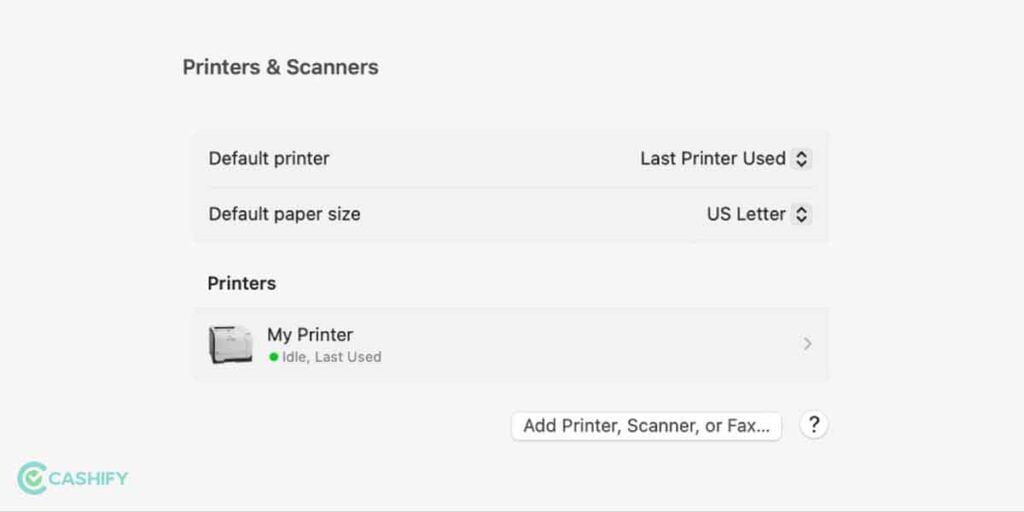
1. Navigate to “System Settings” and look for “Printers and Scanners”
2. Make your printer ready, if it is a USB printer make sure that the cable is plugged into the mac system. And if you see a prompt to download a new software, make sure you download it and install it as per on-screen instructions.
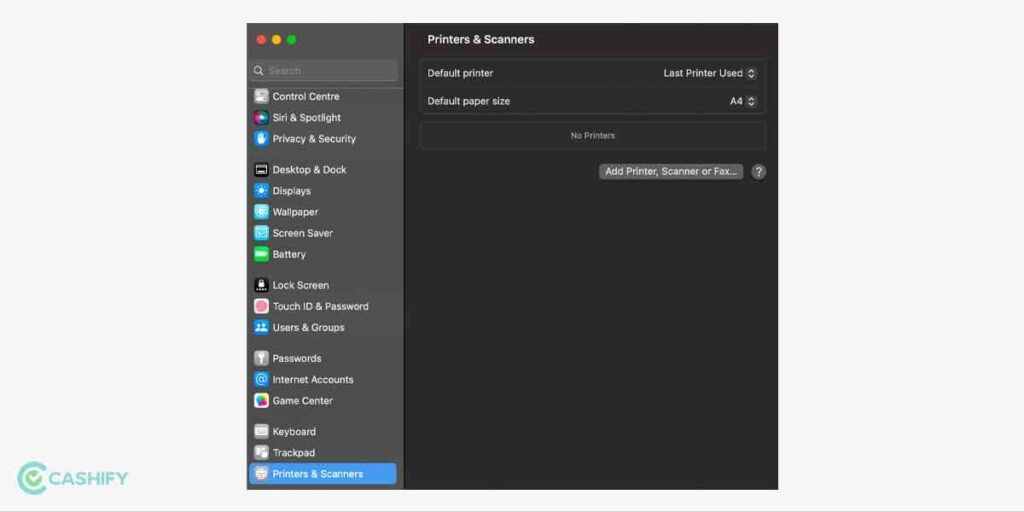
In case you have a Wifi or network Printer, make sure both the printer and mac system is connected to the same Wifi network. To start the process you need to first connect the Network printer using the provided USB wire and install the macOS version of the manufacturer software that came with the printer.
3. Once the setup is done you can now see your printer under the list of available printers.
4. In case you don’t see your printer in the list then select “Add Printer, Scanner or Fax” option.
Also Read: What Is Inkjet Printer: Everything You Need To Know
Using a Printer Driver Installation Program
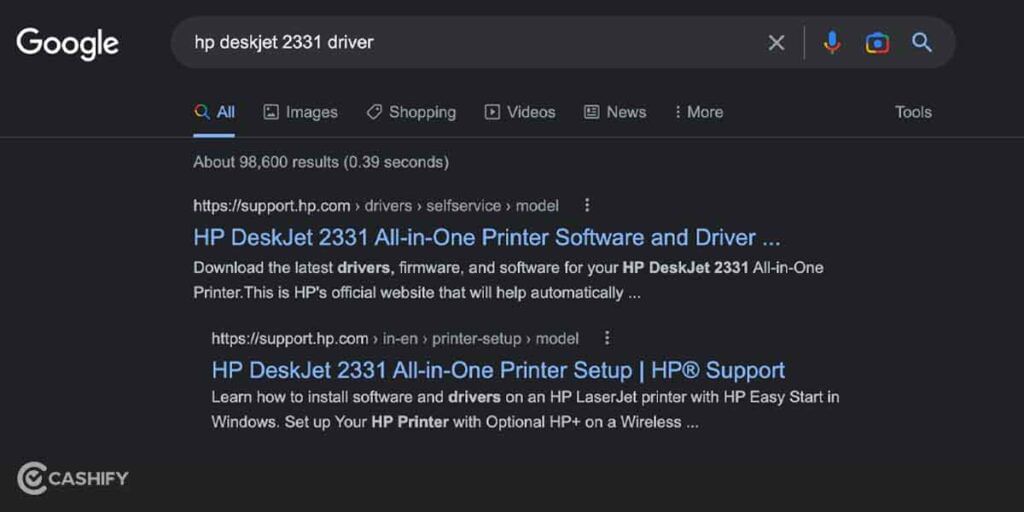
It’s relatively rare these days, but some printers require you to run a printer driver installation program rather than letting Windows do it for you.
Simply google search your Printer’s exact model name and add the keyword ‘Driver’ to the search query and you will find the brand’s official website to download drivers. Or you can go to the manufacturer’s website and locate the printer driver download file (usually located under Support). Double-click the file to run the installation and setup. You’ll be up and running in minutes if you follow the instructions.
Also Read: What Are The Different Types Of Printers? Explained


