Is your laptop running excessively warm? Keeping your laptop temperature in check can help you keep it in working condition for a long duration of time. It’s time to put an end to search for “laptop temperature check” or “how to check laptop temperature” or “how to check cpu temp Windows 11”. This will help you getter better data to monitor your CPU temperature and gauge its cooling effectiveness.
The ideal CPU temperature should be about 45°C- 65°C and for processor-intensive tasks, it can jump to about 70°C. And anything beyond this temperature range should be taken care of and should not happen frequently with 90°C being the absolute limit. These high temperatures can be dangerous for the CPU and can impact the performance
Here are a few ways for how to check cpu temp windows 11 or how to check laptop temperature windows 11 And this guide can also work well with older versions like Windows 10 as well.
Also Read: Best CPU Processor For Gaming In India
How to check Laptop CPU Temperature on Windows 11
There are multiple ways using which you can monitor CPU temperature on Windows 11. The easiest way is from your BIOS and to make things simple there are a few apps that can help you check CPU temperature as well.
Also Read: 5 Best CPU Fan Coolers To Buy In India
Method 1: Check Laptop CPU Temperature Using BIOS/UEFI
This is the easiest way to check CPU temperature and requires you to restart your system and navigate to the BIOS menu. The only disadvantage of this is that you can’t continuously monitor the CPU temperature and you need to visit the BIOS menu every time. Another thing to note is that the BIOS menu interface might be different for your computer. The steps mentioned below will work in most cases. And in case these steps don’t work you need to visit your motherboard manufacturer’s website for more details to access the BIOS interface.
1. Press ALT + F4 to access the Windows Shutdown menu and select Restart from the dropdown menu. And now click on OK to restart your system.
2. Now as soon as the device restarts and the display lights up. Press the hotkey to enter the BIOS interface. Here the BIOS hotkey varies depending on the motherboard manufacturer. For example, most modern motherboards use the DEL key to enter BIOS, but most gaming laptops and gaming PCs are less consistent. The most common hotkeys are DEL, F2 and F12. The easiest way is to hit any try these hotkeys and one should work. Or you can visit your motherboard’s manufacturer’s website to find the exact hotkey.
Also, make sure to hit the desired key multiple times until the BIOS interface appears.
3. In the BIOS menu look for the CPU / Performance Monitor / Hardware Monitor menu and the CPU temperature must be listed there.
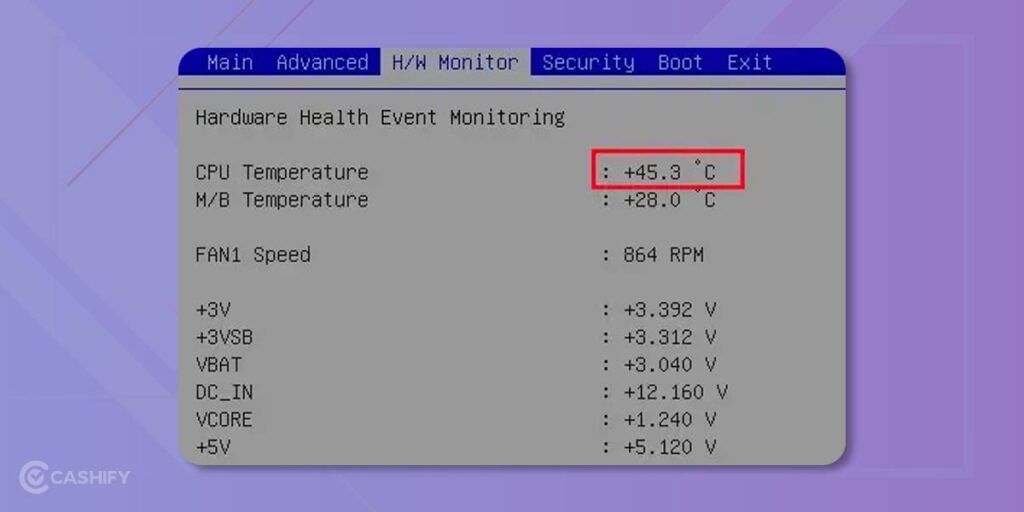
This way everyone can check CPU temperature Windows 11 without installing any third-party apps.
Also Read: Best Graphics Cards (GPU) Ranking List
Method 2: Check Laptop CPU Temperature Using Core Temp App
1. You need to download Core Temp App from here. And download the latest version of the tool.
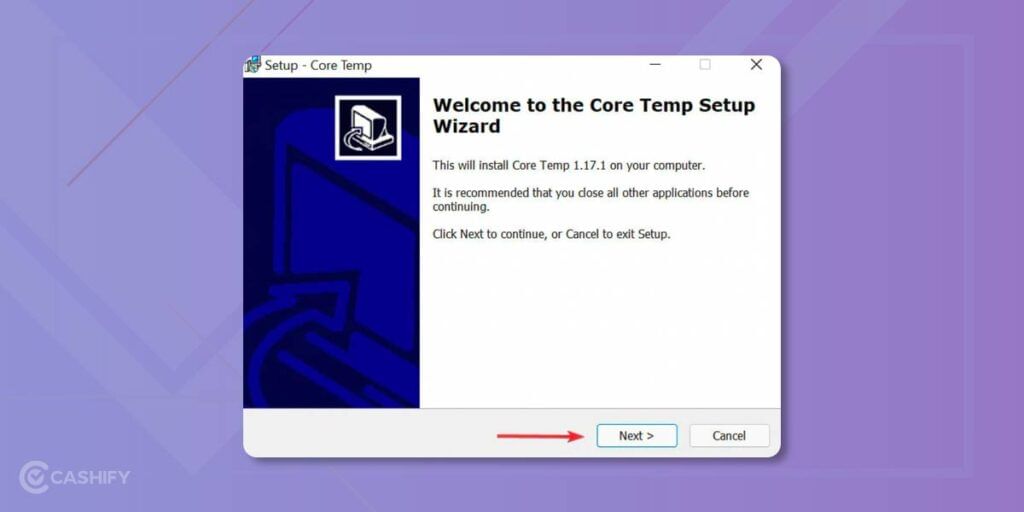
2. Once the setup starts, click on Next and follow on-screen installation instructions. Now complete the installation process and open the app.
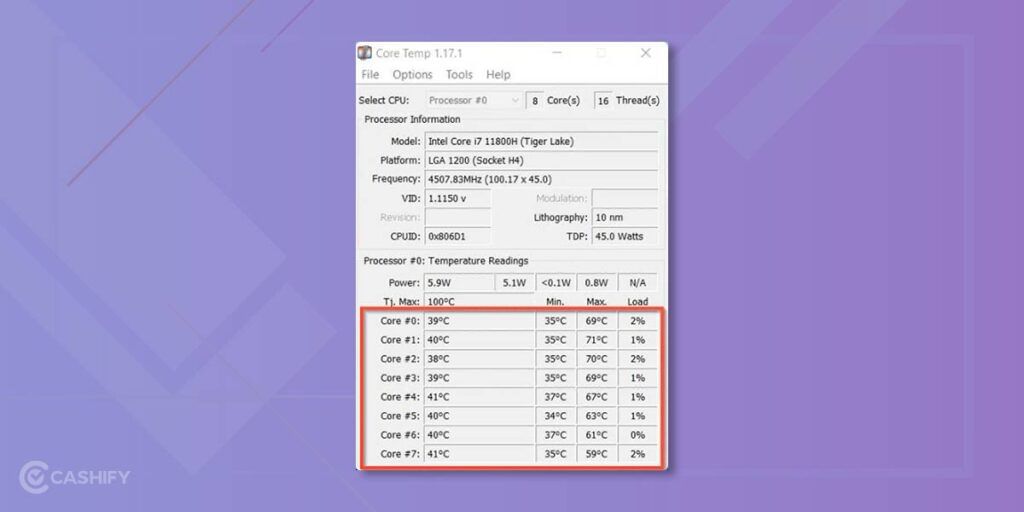
3. Now you can monitor the temperature of each core of your CPU individually. Here the first core is labelled as Core #0 and so on.
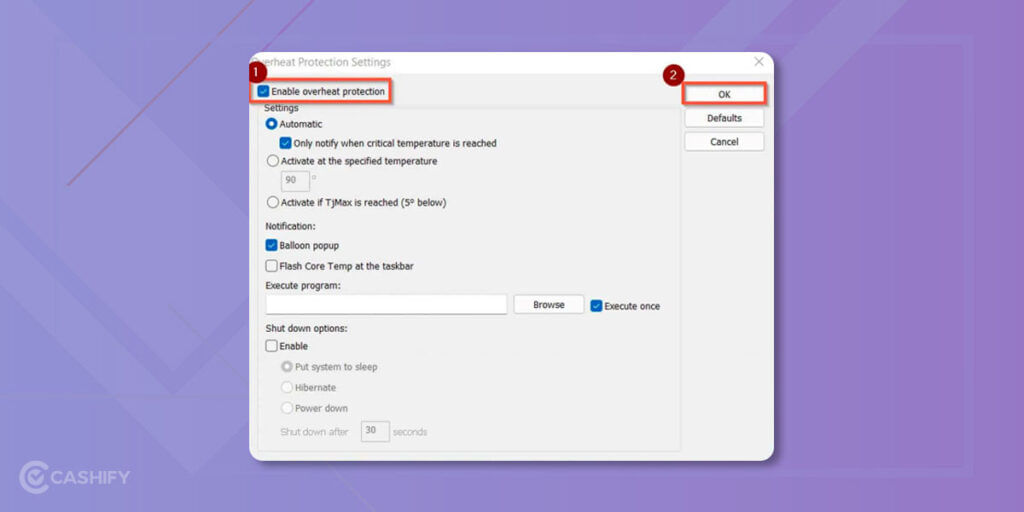
Another interesting feature of the app is Overheat protection which will notify you as soon as a critical CPU temperature is reached. You can even set the system to shut down or hibernate as soon as a predefined critical temperature is reached.
You can even set the app to show live CPU temperature in the system tray. This is a convenient visual reference to continuously monitor CPU temperature.
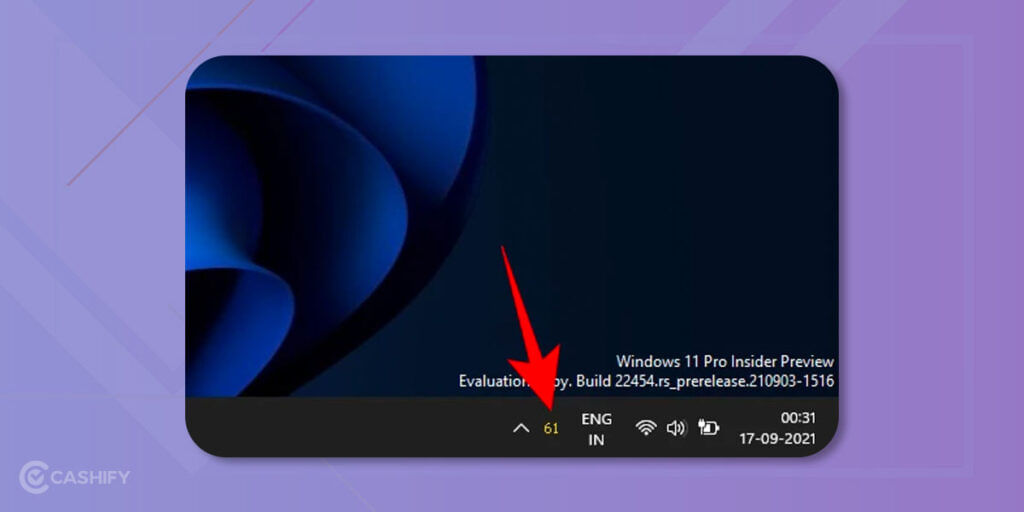
Method 3: Using the Open Hardware Monitor app
The Open Hardware app lets you monitor CPU temperature as well as other PC components such as GPU, Memory, Storage and a lot more.
1. Download Open Hardware Monitor app from Here. Now extract the zip file and inside the ‘OpenHardwareMonitor’ folder launch the Open Hardware Monitor app.
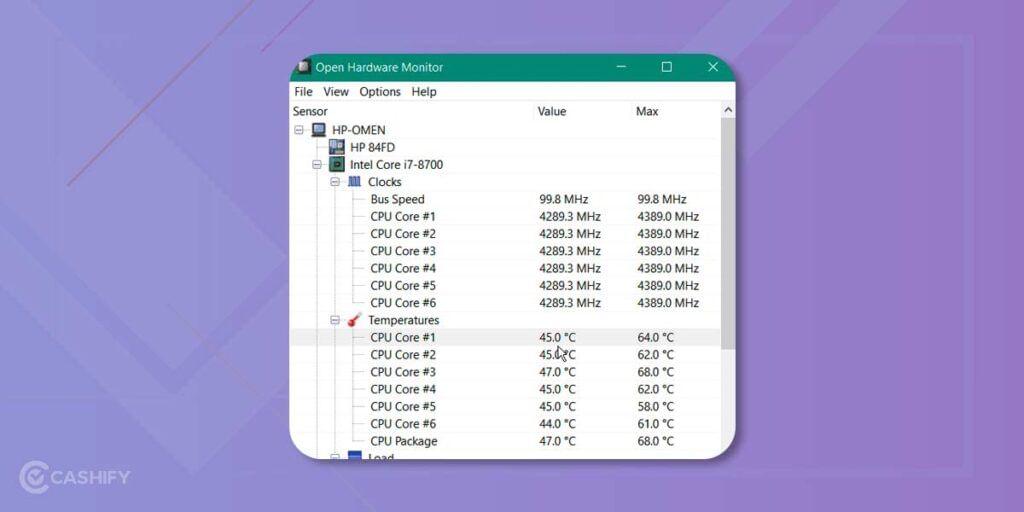
2. Now you can see the CPU name and under this you can three dropdowns, Clocks, Temperatures and Cores. The Temperatures drop down in what we are looking for. Here you can the CPU temperature for all CPU cores. And you can notice that the cores that have a higher Load usually have the highest temperature.
Also Read: AMD Ryzen 3 Vs Intel Core i3: The Best Budget CPU?
Method 4: Using Speccy
Speccy is a hardware monitoring app developed by the developers of CCleaner. Here is how to set up and use the Speccy app to monitor CPU temperatures.
1. Download Speccy from the Official Website Here. Now complete the installation process.
2. Now launch the Speccy app and navigate the CPU section from the menu on the left.
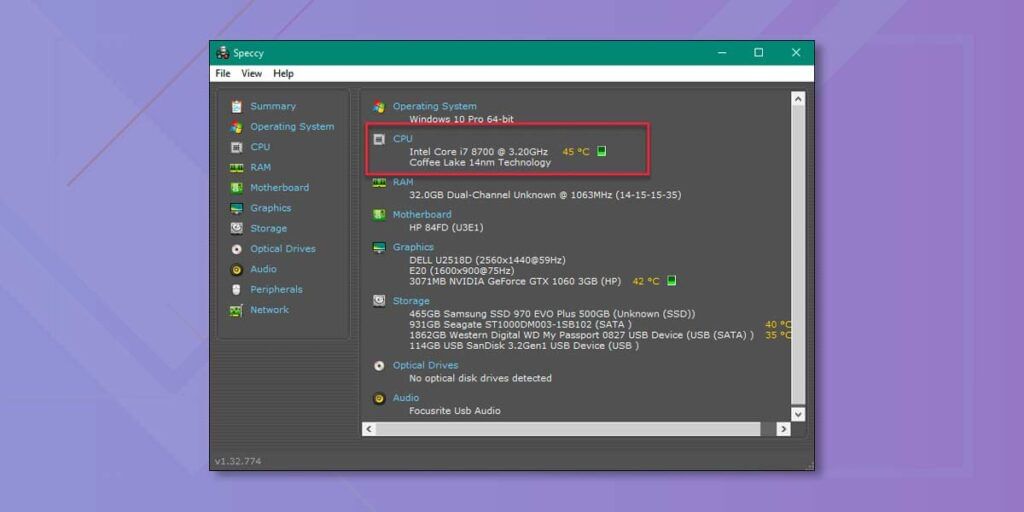
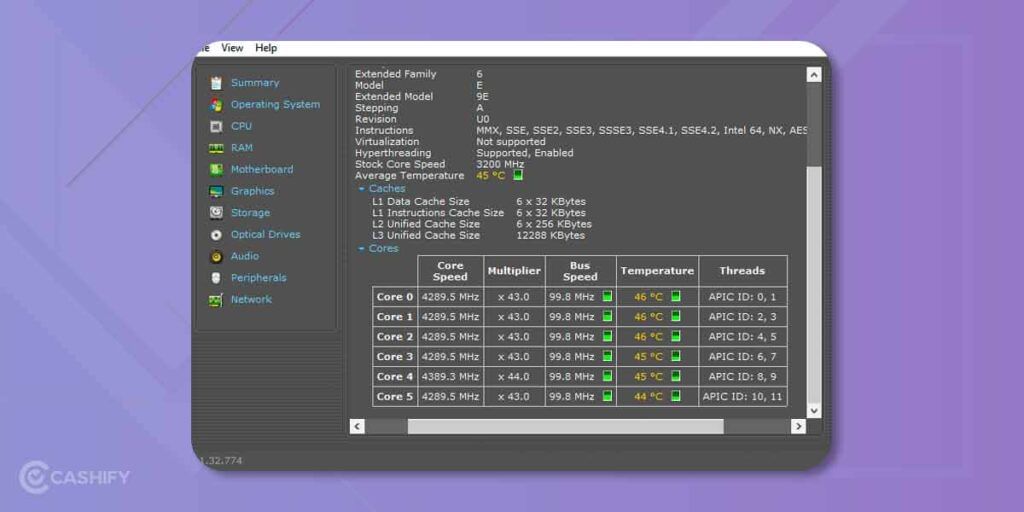
3. Here you can see all details about your CPU including temperature, clock speeds and other vital information to monitor.
Method 5: Using NZXT CAM
Another tool to check CPU temperature is by using this fairly simple third-party app from NZXT.
1. Download the NZXT-CAM-Setup.exe from Here.
2. Now execute the file and complete the installation process by following the on-screen instructions.
3. Now the first time you open the app, it will ask you to signup/log in. But you can click on ‘‘Continue in Guest Mode’’ to skip this process.
4. Now accept and Confirm the legal Terms and Conditions.
5. Now you can select the PC-Monitoring option from the left menu to view the CPU and GPU status. And here you can track the temperature of the CPU, along with CPU Load and other vital details as well.
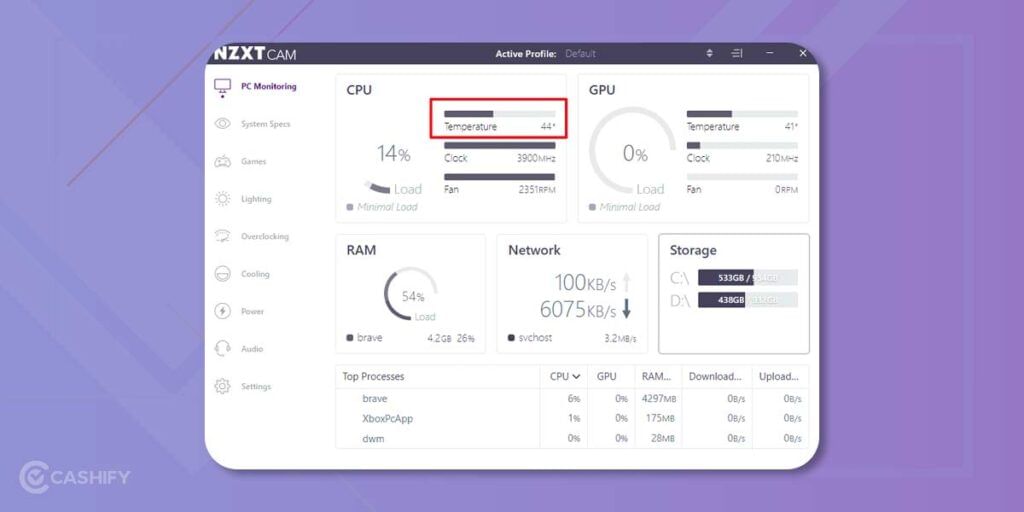
You can even track RAM, Network as well as GPU status as well using the NZXT Cam app.
Also read: AMD Vs Intel: Who’s The Showstopper?
Method-6: Using HWMonitor
Another method for how to perform a laptop temperature check or check CPU temperature in Windows 11 is by using the HW Monitor app. Just follow these steps.
- Download the latest version of HWMonitor by visiting this link.
- Wait for the download to complete and run the “hwmonitor_1.54.exe.”
- Complete the setup process by following the instructions on the screen.
- Run HWMonitor.exe, and it will show you all the data from all the temperatures present on your PC. This includes CPU temperature, GPU temperature, Hard Disk temperature, and more.
Method-7: Using HWiNFO
Last but not least is using an app called HWiNFO for how to check CPU temp in Windows 11. This free app works similar to HWMonitor and lets you perform laptop temperature check. Here is how you can get it running:
- Download HWInfo by visiting the official website. You can choose to download either the installer or the portable version.
- Run “hwi64_806.exe” to install it on your computer. If you don’t wish to install it, you can simply run the portable version.
- Launch the program after it is installed and it will show you the data from all sensor helping you check laptop temperature in Windows 11.
Final words
So, these are a few methods to check CPU temperature in Windows 11. Moreover, we’ve covered here every basic and advanced app you might use to measure the temperature of your Windows 11 accurately. Furthermore, we hope this post will be helpful to you. In addition, please let us know in the comments below if you have any queries or recommendations for other apps that perform better.
Did you know that refurbished mobile phones cost almost 50 per cent less than new phones on Cashify? You also get other discounts, No-cost EMI and more, making it the most affordable way to buy a premium phone. So, what are you waiting for? Buy refurbished mobile phones at your nearest cashify store and avail exclusive offers.


